Prepare a photo for engraving
Use this walkthrough to compare photo settings and inspect the raster job in software. Work with the machine disconnected.
Import, size and crop
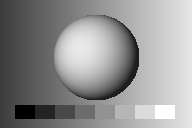
- Download the engraving tone study or use your own photo. Choose Import artwork to add it.
- Select the image. Set its physical dimensions and adjust crop margins in Properties. With the sample, keep the sphere and lower tone strip visible.
- Open Image → Original / processed. Adjust brightness, contrast or gamma and compare again. Check whether the light steps or dark steps have merged.
Compare modes on the same image
- Select exactly one visible, unlocked image and open Compare 12 modes.
- Compare a grayscale mode, an error-diffusion mode and an ordered mode. Check both the shaded edge and the flat tonal steps. Choose Use this mode to apply your preferred sample.
- Open Raster modes and dot patterns for illustrated examples.
Check spacing and preview the job
- Review Pixel / line spacing, physical dimensions and the image layer’s output setting.
- Open Preview job and inspect the scan area and travel. Use the same artwork size when comparing spacing changes.
- Save the
.laserprojto preserve the editable crop, tone and mode settings.